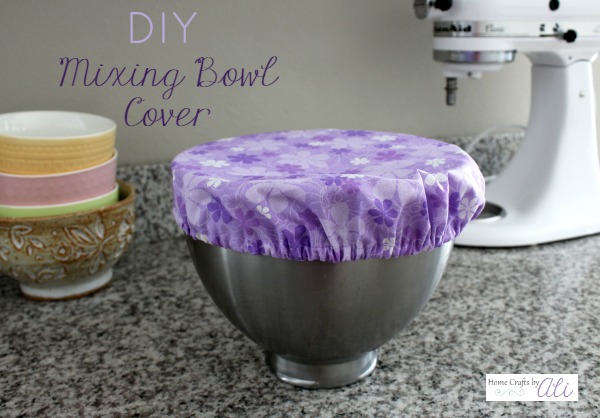
I love using my Kitchen Aid mixer to make black bottom cupcakes, pumpkin pie, and the tastiest mashed potatoes. What I don't love is the dust that always seems to get inside my bowl and on my utensils between uses. Sewing a mixing bowl cover is a great way to keep my items dust free.
** This post contains affiliate links. A small portion of any sale will come to me in exchange for advertising products I love. Thanks for supporting my blog! **
I hope you are enjoying my other posts for National Sewing Month. I'm excited to bring you the first tutorial for this month.
Most of my other sewing tutorials have been for beginners. I would say this tutorial is slightly harder. Sewing the circular material is hard to do at first, especially when you are using such a small seam. It takes patience and care to make sure you turn the fabric enough so your stitches are even.
Supplies Needed
Fabric - fat quarter (18 x 22)
Iron
Sewing Pins
Safety Pin
Elastic - 1/8 inch or 1/4 inch
Thread
Sewing Machine
Scissors/Rotary Cutter
Measuring Tape
Fabric pencil (optional)
Note - The 1/8 inch elastic is slightly rounded and hard to sew with a machine, but works quite well for this project. The 1/4 inch elastic is flatter and will fit under the needle of your sewing machine.
Directions
Iron your fabric. Spread your fabric out with the pattern down to your cutting mat and place your bowl with the opening down on the fabric.
Measure 3 inches from the edge of the bowl. I used my measuring tape and water soluble pencil to make a few marks around the fabric so I knew where to cut. I used my rotary cutter to cut the fabric in a circle. Fabric scissors would work also.
Next I ironed the cut edge of the fabric in so there is a clean edge. Then I folded in the fabric to make about a 1/2 inch hem. It needs to be wide enough that the safety pin can fit through. I pinned the hem around - leaving a 2 inch gap so I can slide the elastic in later.
Next you will sew the hem of the mixing bowl cover. I put my needle into the inner edge of the hem. I sewed it as close to the edge as I could to make certain that the safety pin would fit through in the next part. I sewed around until I reached the part that I left open before.
Measure around your bowl so you know how long to make your elastic. My bowl measured 26.5 inches. I cut my elastic 24.5 inches. The elastic is stretchy and you want the cover to fit snug over the mixing bowl.
Put the safety pin through the end of the elastic, and close the safety pin. Insert the safety pin into the opening of the bowl cover. Slide the safety pin around the whole mixing bowl cover until it comes out the other opening.
Sew the two ends of elastic together, overlapping a small amount. I hand sewed the elastic because it is slightly rounded and I had a hard time when trying to use my sewing machine.
After your elastic is sewn, turn the hem over the bit of elastic that is showing and sew the 2 inch gap closed.
Now each time I want to use my Kitchen Aid mixer, I won't have to wash my utensils and bowl - oh how I dread doing dishes!
This cover fits perfectly on my mixing bowls as well as my Kitchen Aid bowl. So glad it is useful in more than one way!
I've taken a few months off of the Try Something New Every Month Challenge, but this project qualifies for the group. I had never sewed a circular piece of fabric before. It was a challenge for me to make sure I didn't veer too far over the edge of the fabric a few times. I took it slow though and was careful and it worked out quite well. I think that as I practice (I plan to make quite a few more of these for different sized bowls!) I will become more confident.
If you want to join the TSNEM group, it is open to everyone (bloggers or not). You can learn more by visiting this link. If you want to see what others are working on, check out #TSNEM on Instagram.


This is such a terrific idea! I always have to wash my mixing bowl before every use, because it seems to be a magnet for collecting dust.
ReplyDeleteYou should think about marketing these!
This really is a grand idea! I can make one for my bread bowl, too, to cover the dough while it's rising. I prefer to make my bread by hand, so I don't use the stand mixer for it. #Handmade&Otherwise
ReplyDeleteLooks great and such a good idea! Pinned! Thanks for sharing at Handmade & Otherwise- please join us again!
ReplyDelete