September is National Sewing Month. If you are experienced at sewing, now is the perfect time to look through some projects you want to work on. If you are a beginner or haven't sewed anything, now is a great time to start! Many craft/fabric stores are having month long sales on fabric and sewing essentials, so it's the ideal time to visit them and see what great bargains you can find.
Now for the tutorial I have planned for today.
** This post contains affiliate links. I will receive a small portion of any sale in exchange for advertising the products I love. **
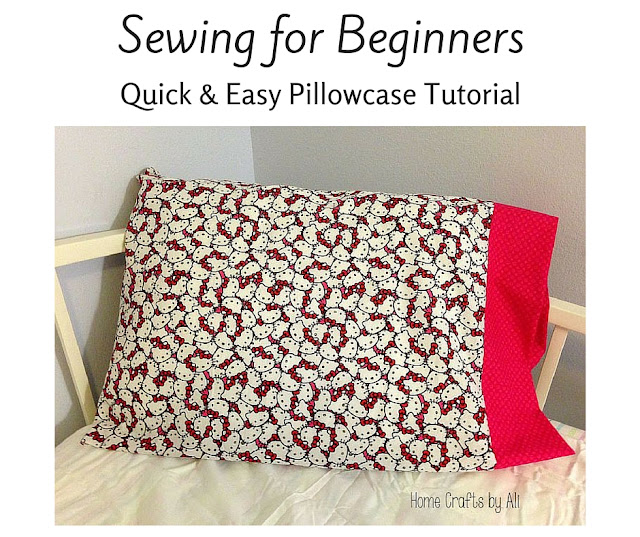
Quick and Easy Pillowcase Tutorial
Materials Needed
3/4 yard fun fabric
1/3 yard fabric that matches
thread
sewing machine
sewing pins
embroidery thread (optional)
When picking your fabric for a pillowcase, I would stick with 100% cotton or flannel. They are the easiest fabrics to work with. Sometimes it is nice to make one with a silky/satin fabric, but they move around easily when sewing so I would wait until you have more experience.
Before you start sewing, you need to iron your fabric. It's been wrapped around a bolt for a while and has creases in it, so you want it nice and smooth.
1. Start by placing your larger fabric with the pattern facing up. Fold the smaller fabric in half the long way, with the pattern side facing each other. You will place this piece, with the loose edges together, on top of your larger fabric piece. Line up the edges.
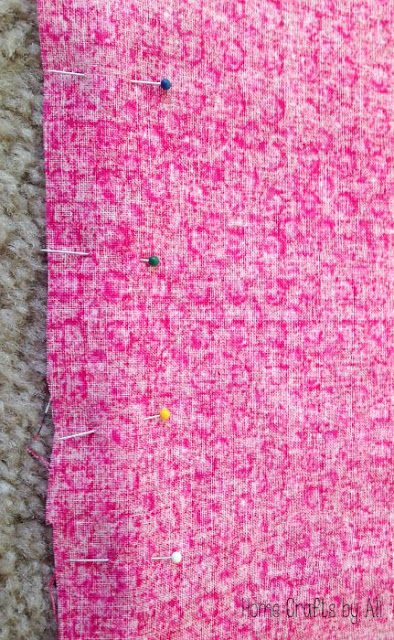
2. Pin the layers of the fabric together along the edge that you are going to sew.
3. I am right handed, so I place the fabric on my machine with the edge that I am sewing on the right. I line up the fabric so the needle is about 1/4-inch in from the edge of the fabric. I pick one of the lines along the base of the machine to line up the fabric and use that as a guide for where the edge of the fabric should be.
4. When you start sewing, run the machine for a few stitches, then use the button or switch to run the machine backwards to where you started. That secures the stitching and it will not come unraveled. Sew along the whole edge of the fabric, removing the pins as you go before you sew over them.
5. Unfold your fabric and this is what it will look like. You will have a seam where the fabrics meet and a nice folded over edge on the end of your smaller fabric. At this point I like to iron the fabric again, making sure to iron at the seam so it is flat when you finish sewing the pillowcase.
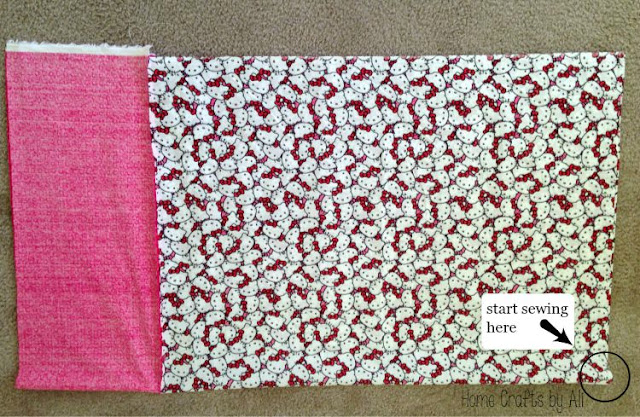
6. Fold your fabric with the pattern facing to the inside. It will look like this photo, except your edging material (the smaller piece) will be sewn over. When I made this I messed up and did an extra step on accident. Pin your fabric along the edges so you will be able to start sewing at the bottom corner of the fabric, where I have put the graphic.
7. Sew along the bottom edge, turn the corner, sew along the long edge, then you are done! Remember to backstitch at the beginning and end of your stitches to keep the seams from unraveling at the ends.
Here is the finished pillowcase folded nicely.
I like to wash my pillowcase before I use it, just to make it a little softer. If you are giving it as a gift, I would wash it as well. If selling this item, I would send it unwashed so it looks crisp and vibrant.
As an added touch when giving this as a gift, it would be nice to use embroidery thread to stitch the name of the person you are giving the pillowcase to along the edging material.
I hope this tutorial was helpful to you and makes you excited to try a new project! Feel free to ask any questions in the comment section down below. If you make a pillowcase, I would love to see pictures, which you can post to my Facebook page.


Great tutorial! I've been sewing for over a year now and I'm yet to make a pillowcase! Think it's about time I did, my kids would love them.
ReplyDeleteThank you for visiting! I bet your kids would love the pillowcases. I would love to see how they turn out. =)
DeleteI need to whip up some new pillow cases. Thanks for the tutorial. Stop by any time if you like share your diys at my weekly party.
ReplyDeleteGlad I could remind you of a fun project. I'll check out your site Theresa, thanks for the invite!
DeleteOh how cool! I wish I had a sewing machine so I could do this.
ReplyDeleteThat's too bad Ann. Maybe a friend has one you could borrow. Or you could make them together, it's more fun to craft together. =)
DeleteThank you so much! I cannot wait to try this. I've been looking for simple sewing projects since I got a sewing machine for Christmas, and I don't have much time to devote to making things. This is awesome!
ReplyDeleteBeth, I'm so glad you found this helpful! I will have a new easy project tutorial every week in September. :)
DeleteAwesome tutorial! I've been meaning to update our pillow cases for a few months now - this might just help me finally get it done :D
ReplyDeleteGlad you found this useful Chrisy! :)
DeleteThis was perfect timing for me! I'm planning to sew my first pillow cases next week :) thanks for sharing the tutorial! and for stopping by at the Talented Tuesday party!
ReplyDeleteLindi @ www.lovecreatecelebrate.com
I'm so glad it was helpful for you! I'd love to see a picture when you are done!
DeleteI haven't made pillowcases in a long time - thanks for the reminder!
ReplyDeleteGlad to remind you of a fun activity! I make some of these up with fun prints for my guests and they enjoy them.
Delete