
**** This post may contain affiliate links ****
Are you ready to find out how to do this easy-on-the-budget project for yourself? Alright, let's get down to it!

Supplies used
light switch cover plate
colorful paper
Plaid Mod Podge Gloss Finish
Mod Podge Silicone Craft Mat
paper trimmer or scissors
sponge brush
Plaid Mod Podge Gloss Finish
Mod Podge Silicone Craft Mat
paper trimmer or scissors
sponge brush
I had all of these items already, so my project was free! If you don't have Mod Podge to use as your craft glue, you can find it at just about any store that sells craft supplies or you can click the link I provided and order it. When I first bought it, I was kind of hesitant to pay $6.99 for a bottle of crafting glue. If you enjoy doing these types of crafts, it will definitely be useful to you and it goes a long way. I have worked on over 25 projects with this one bottle of 8oz glue. It is only halfway used at this point. So I have done 25 projects for about $3.50. That seems like a great deal to me! If you don't have a Mod Podge Craft Mat, remember to use newspaper to cover your crafting area...the Mod Podge is pretty sticky and you don't want to ruin your table. Want to know the benefits of using the Mod Podge craft mat? Click here for my review.

Here is the "before" picture. Remove the light switch cover and wash and dry it. Mine was dusty and you want to make sure you are working with a clean surface.
Next you want to choose a paper that looks good with your room. We held up 10 different choices of papers before we chose the one that we liked the best.

You can use scrapbook paper, gift wrap paper, or get inventive and make a collage of pictures, scrap paper, or tissue paper.

Place your paper with the pattern side down. Put your light switch plate on the paper and trace it. I left extra room so there would be enough to cover the plate and then fold a bit over the back side. Cut the paper with your trimmer or scissors.

Apply a medium layer of Mod Podge, with the sponge brush, to the light switch cover plate. I also put a thin layer on the paper that I used. It is easier to make sure that you get glue on the edges when you apply it to the paper.

Place the paper onto your working area, glue side up. Place the light switch cover onto the paper. Check to make sure of smoothness, but be careful so you don't rip the paper.
Next you want to fold the paper over the back and use the glue to make sure it is smooth. It is easiest if you make cuts at the corner of the paper so you can fold each side easily. I usually apply a thin coat of Mod Podge to the top of the paper where it meets the switch plate to make sure that it is sealed nicely.

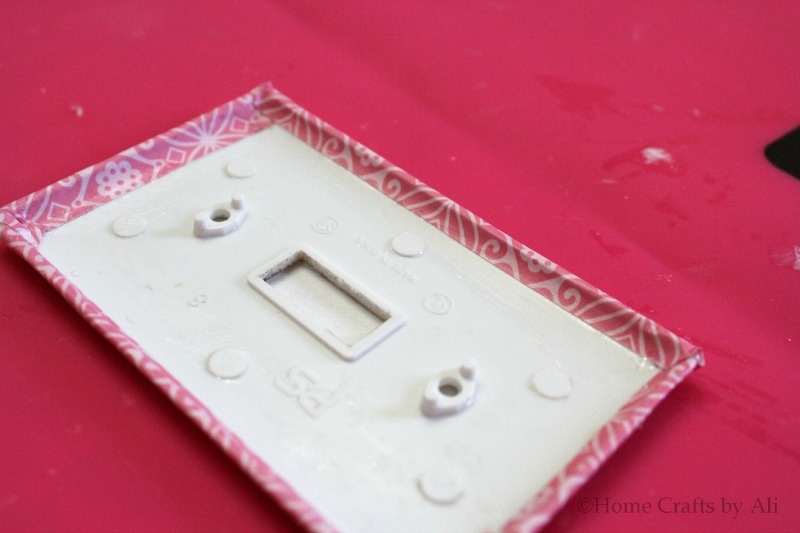
With a craft knife, make a thin cut in the middle of the paper where the switch goes. Then make cuts to each corner. You will then be able to fold pieces back cleanly and glue them down. I then put the screws through the holes where they will go when hanging it back up. If you try to do this after applying the finishing layers of Mod Podge, it could be too thick. I make the holes, then put the screws to the side so I can finish the project.

Apply a thin layer of Mod Podge to the whole project and let it dry for about 20 minutes, then add another thin layer. Your project will feel dry within an hour, but you should probably let it dry overnight.

Put the switch cover plate back on the wall and reattach the screws. You then have a nicely decorated light switch cover in the paper of your choice. This is an easy project to work on, it's budget friendly, and it looks nice when done! I can't wait to get started decorating the other light switch covers in our house!


I have often wanted to change covers out with decorative plates but have not wanted to spend the money. I like this idea of doing it for free with scrapbook paper, which I always have.
ReplyDeleteI found a decorative plate my daughter would love....but didn't want to pay $8.50! This was a good compromise. Free for me and she gets to design the one for her room.
DeleteI need to do these to my light switches!
ReplyDeleteI had never really thought about them before, but it makes the room a little more cheerful.
DeleteThat looks great, and so simple!
ReplyDeleteVery simple way to do a little updating. Thanks for stopping by!
DeleteAs I type there is a really ugly light switch right at eye level… it's now very difficult to ignore!!
ReplyDeleteI know what you mean! I never noticed them before, but now the ones that I haven't done just look drab.
DeleteI absolutely love this idea. Thanks for sharing this!
ReplyDeleteYou're welcome! Thanks for stopping by.
DeleteWhat a great idea! So easy to change up the look and feel of a room with this :)
ReplyDeleteI thought it was fun. I can't wait to do the rest of my rooms. Thanks for commenting Ashley!
Delete